一、介紹
Vagrant是一個構建和管理虛擬機(VirtualBox)的工具。
我的環境:Mac + Vagrant + VirtualBox
網盤下載地址:鏈接: https://pan.baidu.com/s/1LKacXPQcgh3MjgWiIZ0zhQ 密碼: n998
二、安裝
VirtualBox: https://www.virtualbox.org/wiki/Downloads
Vagrant: http://downloads.vagrantup.co
三、在線創建虛擬機
1.在官網找到自己想要安裝的操作系統:https://app.vagrantup.com/boxes/search
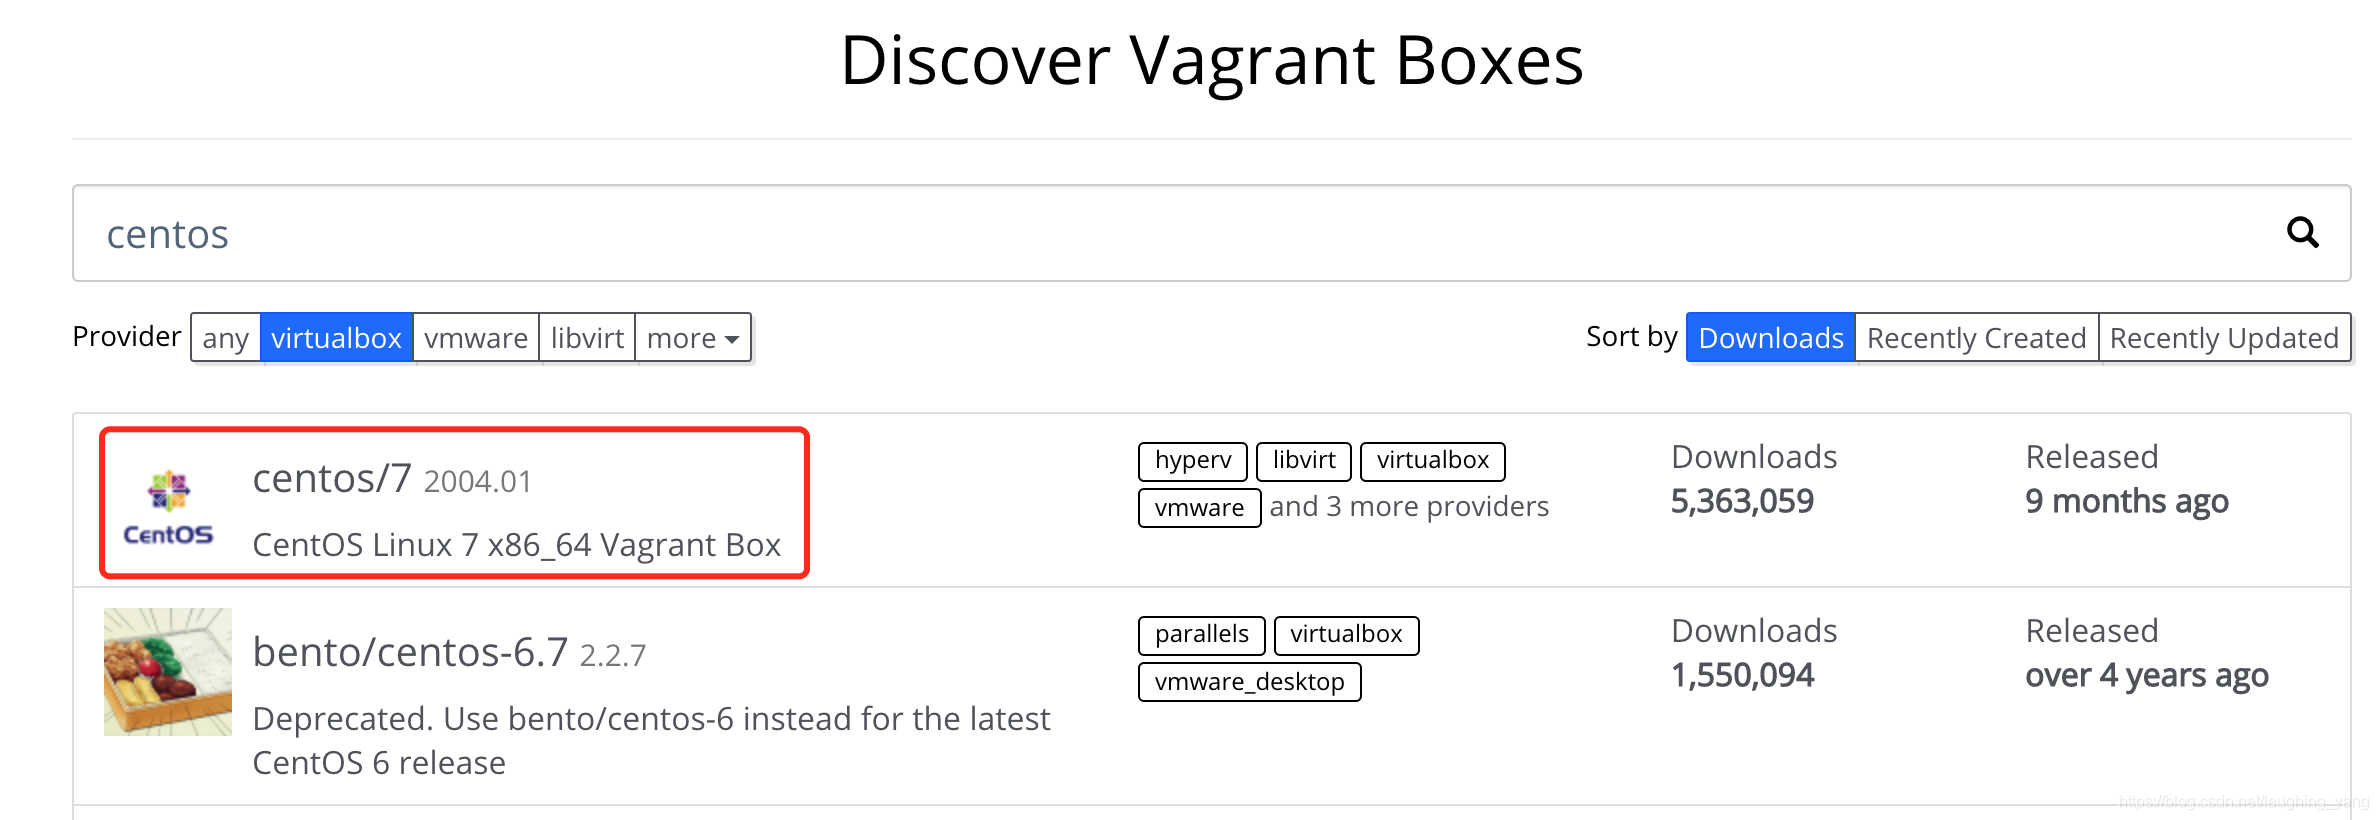
2.點進去,執行命令創建并啟動虛擬機:https://app.vagrantup.com/centos/boxes/7
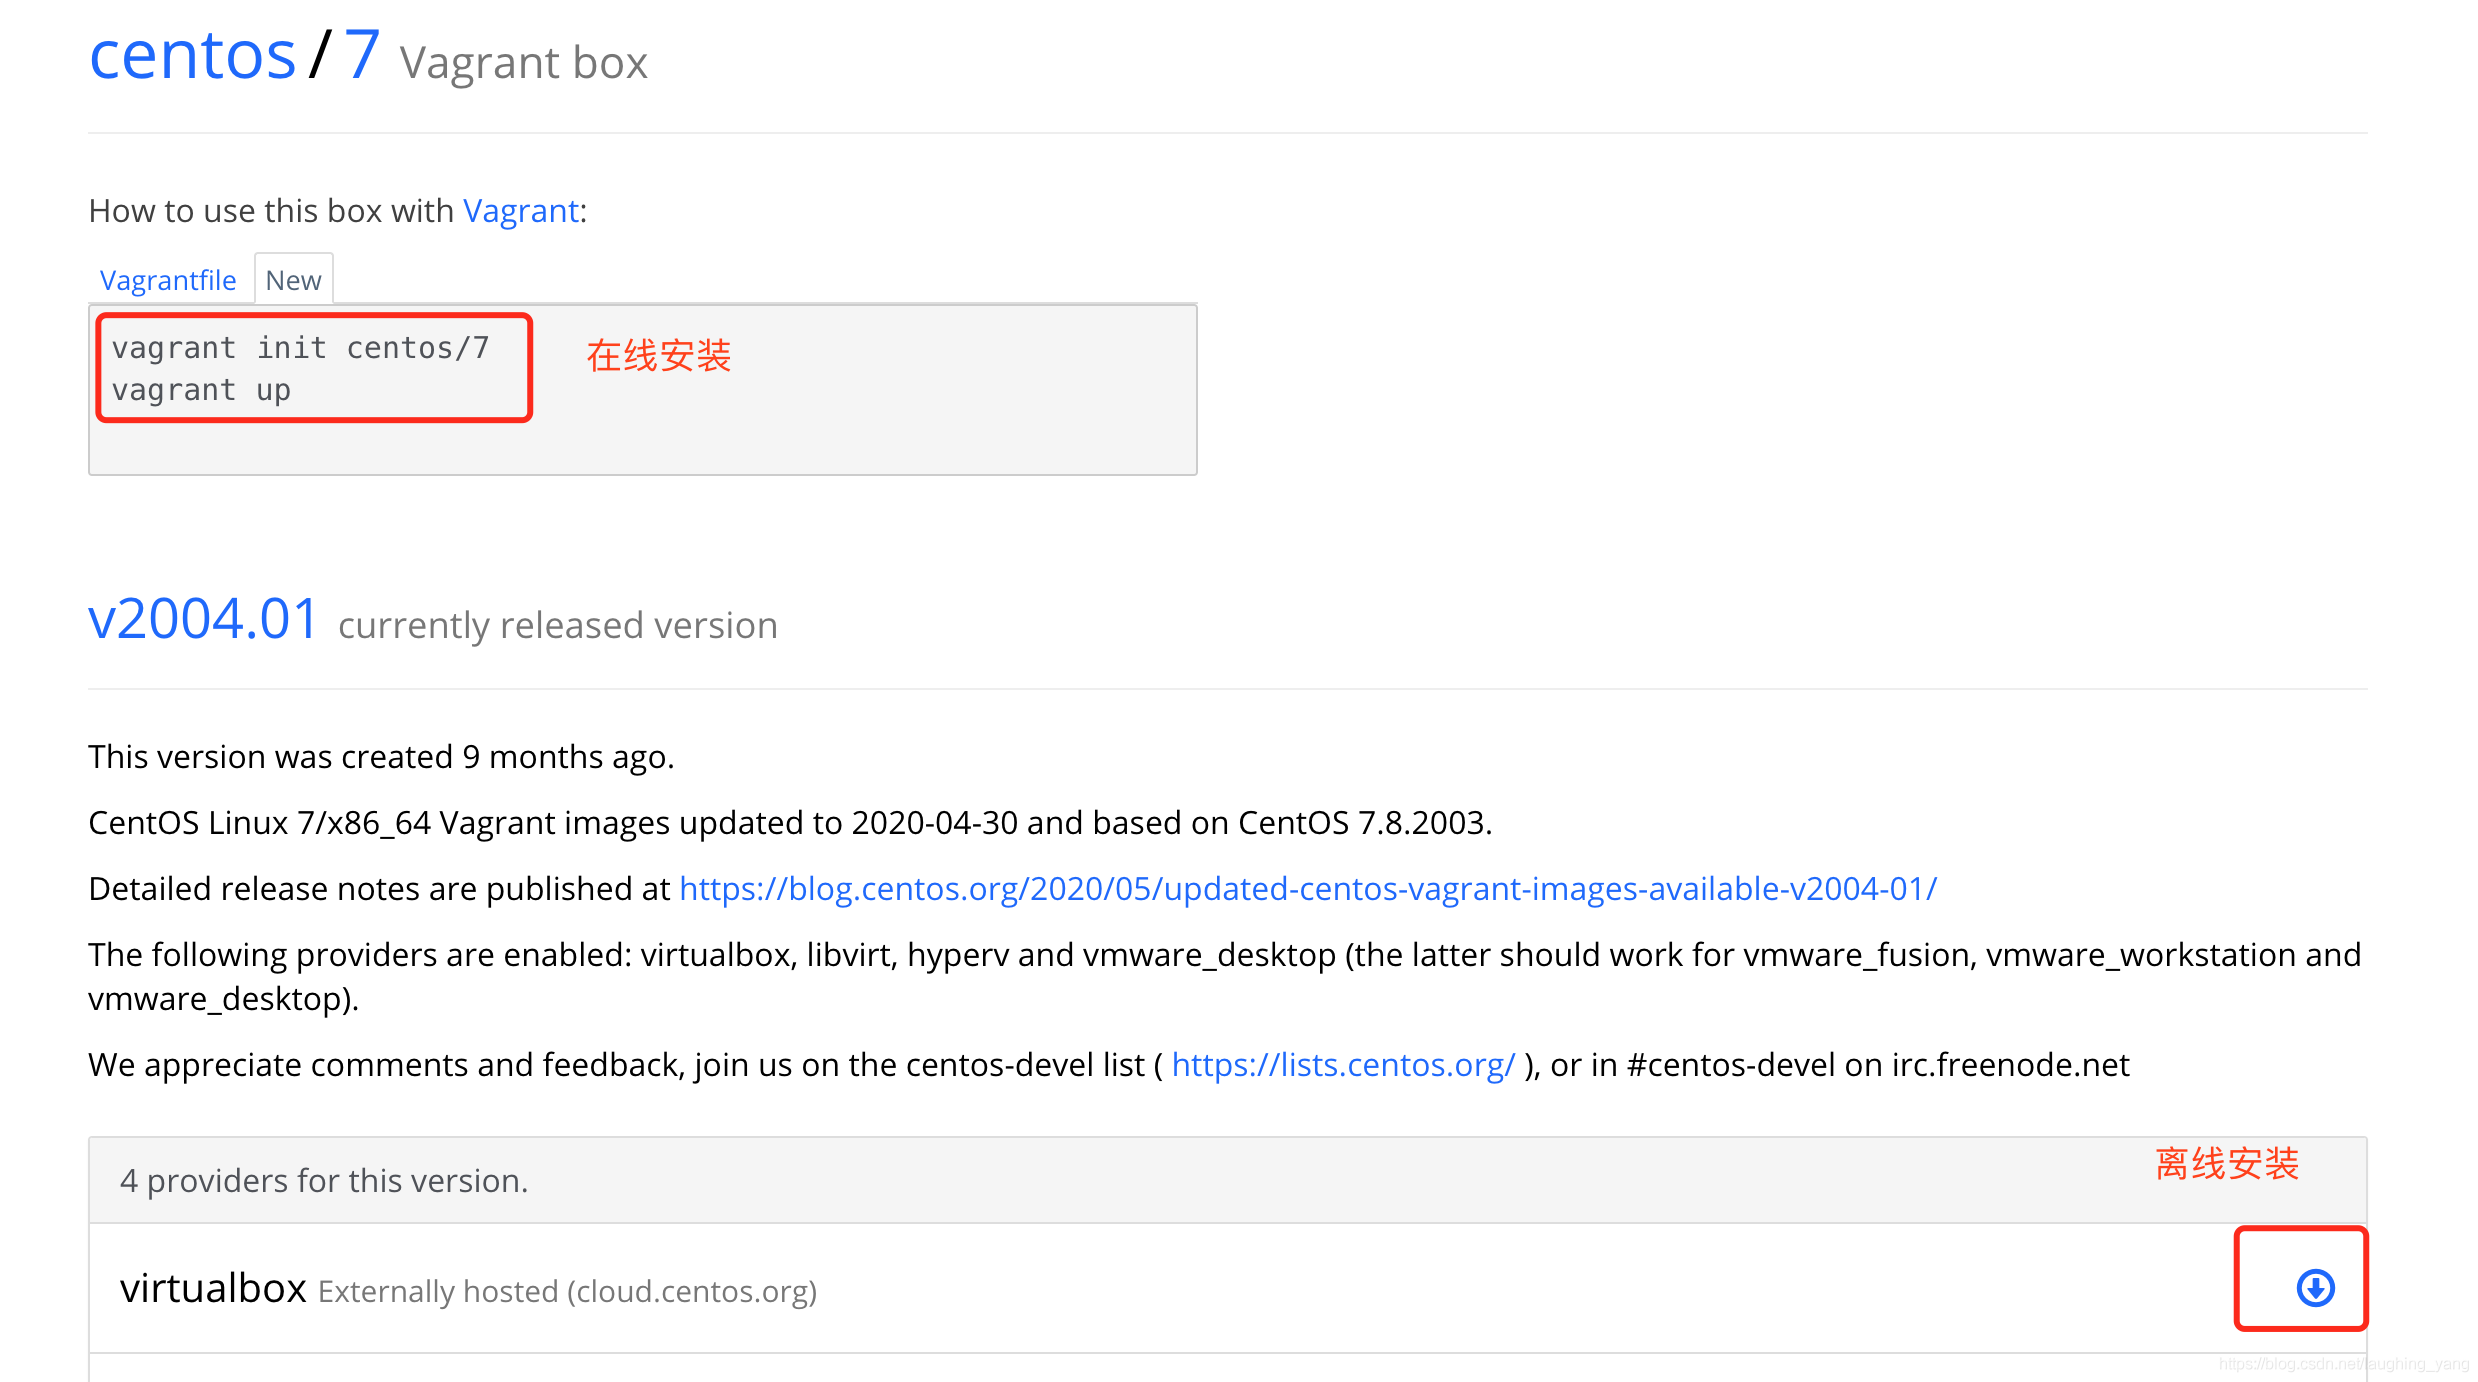
注意:需要單獨創建一個目錄,在該目錄下執行vagrant命令,一個目錄對應一個虛擬機。vagrant init會創建一個配置文件Vagrantfile
三、離線創建虛擬機
1.添加
vagrant box add centOs7 /Users/xianbin.yang/Documents/vagrant/centos-7.0-x86_64.box
➜ vagrant vagrant box add centOs7 /Users/xianbin.yang/Documents/vagrant/centos-7.0-x86_64.box
==> box: Box file was not detected as metadata. Adding it directly...
==> box: Adding box 'centOs7' (v0) for provider:
  box: Unpacking necessary files from: file:///Users/xianbin.yang/Documents/vagrant/centos-7.0-x86_64.box
==> box: Successfully added box 'centOs7' (v0) for 'virtualbox'!
2.初始化
vagrant init centOs7
➜ vagrant vagrant init centOs7
A `Vagrantfile` has been placed in this directory. You are now
ready to `vagrant up` your first virtual environment! Please read
the comments in the Vagrantfile as well as documentation on
`vagrantup.com` for more information on using Vagrant.
3.啟動
vagrant up
➜ vagrant vagrant up
Bringing machine 'default' up with 'virtualbox' provider...
==> default: Importing base box 'centOs7'...
==> default: Matching MAC address for NAT networking...
==> default: Setting the name of the VM: vagrant_default_1612583375721_1893
==> default: Clearing any previously set forwarded ports...
==> default: Clearing any previously set network interfaces...
==> default: Preparing network interfaces based on configuration...
  default: Adapter 1: nat
==> default: Forwarding ports...
  default: 22 (guest) => 2222 (host) (adapter 1)
==> default: Booting VM...
==> default: Waiting for machine to boot. This may take a few minutes...
  default: SSH address: 127.0.0.1:2222
  default: SSH username: vagrant
  default: SSH auth method: private key
  default:
  default: Vagrant insecure key detected. Vagrant will automatically replace
  default: this with a newly generated keypair for better security.
  default:
  default: Inserting generated public key within guest...
  default: Removing insecure key from the guest if it's present...
  default: Key inserted! Disconnecting and reconnecting using new SSH key...
==> default: Machine booted and ready!
==> default: Checking for guest additions in VM...
  default: The guest additions on this VM do not match the installed version of
  default: VirtualBox! In most cases this is fine, but in rare cases it can
  default: prevent things such as shared folders from working properly. If you see
  default: shared folder errors, please make sure the guest additions within the
  default: virtual machine match the version of VirtualBox you have installed on
  default: your host and reload your VM.
  default:
  default: Guest Additions Version: 4.3.28
  default: VirtualBox Version: 6.1
==> default: Mounting shared folders...
  default: /vagrant => /Users/xianbin.yang/Documents/vagrant
四、常用命令
|
| 命令 |
作用 |
| vagrant box add |
添加box的操作 |
| vagrant init |
初始化box的操作,會生成vagrant的配置文件Vagrantfile |
| vagrant up |
啟動本地環境 |
| vagrant ssh |
通過 ssh 登錄本地環境所在虛擬機 |
| vagrant halt |
關閉本地環境 |
| vagrant suspend |
暫停本地環境 |
| vagrant resume |
恢復本地環境 |
| vagrant reload |
修改了 Vagrantfile 后,使之生效(相當于先 halt,再 up) |
| vagrant destroy |
徹底移除本地環境 |
| vagrant box list |
顯示當前已經添加的box列表 |
| vagrant box remove |
刪除相應的box |
| vagrant status |
獲取當前虛擬機的狀態 |
五、Vagrantfile常用配置
1.配置固定ip、內存、cpu
# -*- mode: ruby -*-
# vi: set ft=ruby :

Vagrant.configure("2") do |config|
 config.vm.box = "centOs7"
 config.vm.network "private_network", ip: "192.168.33.10"
 config.vm.provider "virtualbox" do |vb|
   vb.cpus = 4
   vb.memory = "8192"
 end
end
注意:配置后需要vagrant reload
2.配置root用戶和ssh免密
vagrant用戶登錄:vagrant ssh
設置root密碼:sudo passwd root
配置ssh免密:ssh-copy-id root@192.168.33.10
ssh登錄:ssh root@192.168.33.10
3.關閉防火墻
檢查防火墻狀態:systemctl status firewalld
關閉防火墻:systemctl stop firewalld
設置開機禁用防火墻:systemctl disable firewalld.service
參考鏈接:
https://learn.hashicorp.com/tutorials/vagrant/getting-started-index?in=vagrant/getting-started
到此這篇關于vagrant+virtualBox構建虛擬機的文章就介紹到這了,更多相關virtualBox構建虛擬機內容請搜索腳本之家以前的文章或繼續瀏覽下面的相關文章希望大家以后多多支持腳本之家!