前言
最近在聽極客時間的課程,里面的講師極力推崇 pytest 框架,鄙視 unittest 框架,哈哈!然后查了些資料,發現了一條 python 鄙視鏈:pytest 鄙視 > unittest 鄙視 >robotframework 。
pytest 是 python 的第三方單元測試框架,比自帶 unittest 更簡潔和高效,支持315種以上的插件,同時兼容 unittest 框架。這就使得我們在 unittest 框架遷移到 pytest 框架的時候不需要重寫代碼。接下來我們在文中來對分析下 pytest 有哪些簡潔、高效的用法。
一、安裝
首先使用 pip 安裝 pytest
查看 pytest 是否安裝成功
二、簡單使用
1.創建 test_sample.py 文件,代碼如下:
#!/usr/bin/env python
# coding=utf-8
import pytest

def inc(x):
    return x + 1

def test_answer():
    assert inc(3) == 5

if __name__ =="__main__":
    pytest.main()
執行結果:
test_sample.py F [100%]
================================== FAILURES ===================================
_________________________________ test_answer _________________________________
def test_answer():
> assert inc(3) == 5
E assert 4 == 5
E + where 4 = inc(3)
test_sample.py:19: AssertionError
============================== 1 failed in 0.41s ==============================
從上面的例子可以看出,pytest 中斷言的用法直接使用 assert ,和 unittest 中斷言 self.assert 用法有所區別。
2.總結一下:使用 pytest 執行測試需要遵行的規則:
- .py 測試文件必須以test_開頭(或者以_test結尾)
- 測試類必須以Test開頭,并且不能有 init 方法
- 測試方法必須以test_開頭
- 斷言必須使用 assert
三、fixture
pytest 提供的 fixture 實現 unittest 中 setup/teardown 功能,可以在每次執行case之前初始化數據。不同點是,fixture 可以只在執行某幾個特定 case 前運行,只需要在運行 case 前調用即可。比 setup/teardown 使用起來更靈活。
1.fixture scope 作用范圍
先看下 fixture 函數的定義:
def fixture(scope="function", params=None, autouse=False, ids=None, name=None):
    """
    :arg scope:    可選四組參數:function(默認)、calss、module、package/session
    :arg params:   一個可選的參數列表,它將導致多個參數調用fixture函數和所有測試使用它。
    :arg autouse:  如果為True,則fixture func將為所有測試激活可以看到它。如果為False(默認值),則需要顯式激活fixture。
    :arg ids:      每個參數對應的字符串id列表,因此它們是測試id的一部分。如果沒有提供id,它們將從參數中自動生成。
    :arg name:     fixture的名稱。 這默認為裝飾函數的名稱。 如果fixture在定義它的同一模塊中使用,夾具的功能名稱將被請求夾具的功能arg遮蔽; 解決這個問題的一種方法是將裝飾函數命名 “fixture_ fixturename>”然后使用”@ pytest.fixture(name ='fixturename>')”。
  """
重點說下 scope 四組參數的意義:
- function:每個方法(函數)都會執行一次。
- class:每個類都會執行一次。類中有多個方法調用,只在第一個方法調用時執行。
- module:一個 .py 文件執行一次。一個.py 文件可能包含多個類和方法。
- package/session:多個文件調用一次,可以跨 .py 文件。
在所需要調用的函數前面加個裝飾器 @pytest.fixture()。舉一個簡單的例子:
#!/usr/bin/env python
# coding=utf-8
import pytest

@pytest.fixture(scope='function')
def login():
    print("登錄")

def test_1():
    print('測試用例1')

def test_2(login):
    print('測試用例2')


if __name__ =="__main__":
    pytest.main(['test_sample.py','-s'])
執行結果:
test_sample.py
測試用例1
.
登錄
測試用例2
.
============================== 2 passed in 0.07s ==============================
2.yield
我們剛剛實現了在每個用例之前執行初始化操作,那么用例執行完之后如需要 清除數據(或還原)操作,可以使用 yield 來實現。
#!/usr/bin/env python
# coding=utf-8
import pytest

@pytest.fixture(scope='function')
def login():
    print("登錄")
    yield
    print("注銷登錄")

def test_1():
    print('測試用例1')

def test_2(login):
    print('測試用例2')

if __name__ =="__main__":
    pytest.main(['test_sample.py','-s'])
執行結果:
test_sample.py
測試用例1
.
登錄
測試用例2
.注銷登錄
============================== 2 passed in 0.08s ==============================
3.conftest
上面的案例都是寫在同一個.py 文件內的。倘若有多個.py 文件需要調用 login() 方法,就必須把 login() 方法寫在外面,這里引用了conftest.py 配置文件。test_xxx.py 測試文件中無需 import conftest,pytest 會自動搜索同級目錄中的 conftest.py 文件。
conftest.py 與 測試文件 目錄層級關系
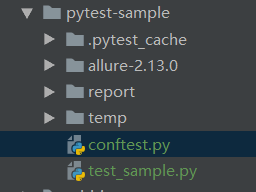
# 新建conftest.py,和 test_sample.py 同級目錄
import pytest

@pytest.fixture(scope='function')
def login():
    print("登錄")


# test_sample.py 代碼如下
import pytest

def test_1():
    print('測試用例1')

def test_2(login):
    print('測試用例2')

if __name__ =="__main__":
    pytest.main(['test_sample.py','-s'])
執行結果:
test_sample.py
測試用例1
.
登錄
測試用例2
.
============================== 2 passed in 0.01s ==============================
四、重試機制
有的時候用例執行失敗了,然后排查發現不是代碼問題,可能和環境或者網絡不穩定有關系,這個時候可以引入重試機制,排除一些外在因素。
1、安裝pytest-rerunfailures
pip3showpytest-rerunfailures
2、重試的兩種方法
1)使用裝飾器@pytest.mark.flaky(reruns=5,reruns_delay=2)
reruns :最大重試次數
reruns_delay :重試間隔時間,單位是秒
#!/usr/bin/env python
# coding=utf-8
import pytest


@pytest.mark.flaky(reruns=5, reruns_delay=2)
def test():
    assert 0==1

if __name__ =="__main__":
    pytest.main(['test_sample.py','-s'])
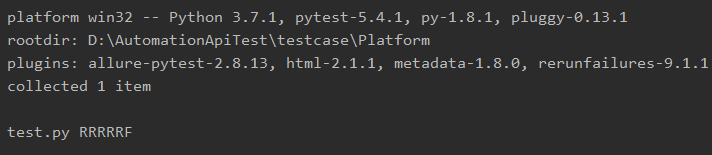
R表示用例失敗后正在重試,嘗試5次。
2)也可以使用命令行pytest--reruns5--reruns-delay 2 -s ,參數與裝飾器 @pytest.mark.flaky 一致,這個就不多說了。
到此這篇關于Pytest 使用簡介的文章就介紹到這了,更多相關Pytest 使用內容請搜索腳本之家以前的文章或繼續瀏覽下面的相關文章希望大家以后多多支持腳本之家!
您可能感興趣的文章:- Python 測試框架unittest和pytest的優劣
- 詳解如何使用Pytest進行自動化測試
- 詳解Pytest測試用例的執行方法
- 自動化測試Pytest單元測試框架的基本介紹
- pytest基本用法簡介
- Python自動化測試框架pytest的詳解安裝與運行