首先nginx容器內部的結構:
進入容器:
docker exec -it b511b6049f57 bash
查看容器的結構目錄:其實每一個容器就相當于一個獨立的系統。
root@b511b6049f57:/# ls
bin  dev home lib64	mnt proc run	 srv tmp var
boot etc lib	 media	opt root sbin sys usr
nginx的結構目錄在容器中:
- 日志位置:/var/log/nginx/
- 配置文件位置:/etc/nginx/
- 項目位置:/usr/share/nginx/html
如果你想在本地去添加location 需要把這些容器中的配置掛載到本地:
配置文件相對來說有點麻煩,一般nginx只需要加載nginx.conf就可以了,在dokcer中,是首先加載nginx.conf,然后在nginx.conf有這么一行include /etc/nginx/conf.d/*.conf;,就是加載conf.d目錄下的配置文件。所以對于配置只需要掛載到conf.d,覆蓋掉即可。
在本地創建對應的文件夾和主配置文件nginx.conf:
mkdir -p /home/test/nginx/{log,conf,html}
touch nginx.conf
nginx.conf包含子配置文件(最后一行):
user nginx;

worker_processes 1;

error_log /var/log/nginx/error.log warn;
pid    /var/run/nginx.pid;


events {
  worker_connections 1024;
}


http {
  include    /etc/nginx/mime.types;
  default_type application/octet-stream;

  log_format main  '"$remote_addr" "$http_host" "[$time_local]" "$request" "$status" "$body_bytes_sent" '
          '"$bytes_sent" "$gzip_ratio" "$http_referer" "$http_user_agent" "$http_x_forwarded_for" '
          '"$upstream_addr" "$upstream_response_time" "$request_time" "$request_body" "$http_authorization" ';
  access_log /var/log/nginx/access.log main;

  sendfile    on;
  #tcp_nopush   on;

  keepalive_timeout 65;

  #gzip on;

  include /etc/nginx/conf.d/*.conf;
}
在 conf下創建一個默認的default.conf:
server {
listen 80;
server_name localhost;
#charset koi8-r;
access_log /var/log/nginx/log/host.access.log main;
location / {
#root /data/nginx/html;
root /usr/share/nginx/html;
index index.html index.htm;
#autoindex on;
#try_files $uri /index/index/page.html;
#try_files $uri /index/map/page.html;
}
#error_page 404 /404.html;
# redirect server error pages to the static page /50x.html
#
error_page 500 502 503 504 /50x.html;
location = /50x.html {
root /usr/share/nginx/html;
}
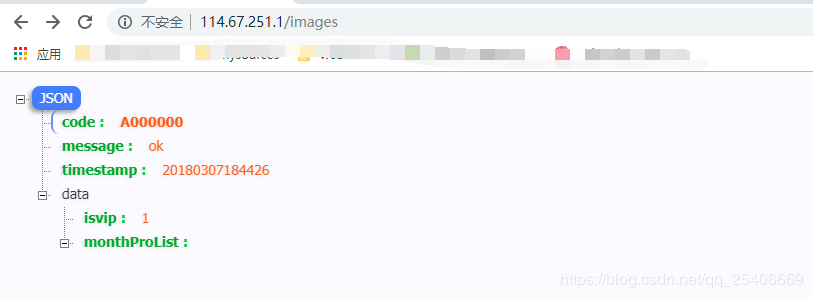
location ~ /images {
default_type application/json;
return 200 '{"code": "A000000", "message": "ok", "timestamp": "20180307184426", "data": {"isvip": "1", "monthProList": []}}';
}
# proxy the PHP scripts to Apache listening on 127.0.0.1:80
#
#location ~ \.php$ {
# proxy_pass http://127.0.0.1;
#}
# pass the PHP scripts to FastCGI server listening on 127.0.0.1:9000
#
#location ~ \.php$ {
# root html;
# fastcgi_pass 127.0.0.1:9000;
# fastcgi_index index.php;
# fastcgi_param SCRIPT_FILENAME /scripts$fastcgi_script_name;
# include fastcgi_params;
#}
# deny access to .htaccess files, if Apache's document root
# concurs with nginx's one
#
#location ~ /\.ht {
# deny all;
#}
}
準備完成上面的本地文件以后開始啟動容器掛載到本地相關配置文件:
docker run --name docker_nginx -d -p 80:80 \

-v /home/test/nginx/log:/var/log/nginx \

-v /home/test/nginx/conf:/etc/nginx/conf.d \

-v /home/test/nginx/nginx.conf:/etc/nginx/nginx.conf \

-v /home/test/nginx/html:/usr/share/nginx/html nginx

###
  第一個-v:掛載日志目錄
  第二個-v:掛載配置目錄
  第三個-v:掛載主配置文件
  第四個-v:掛載項目目錄
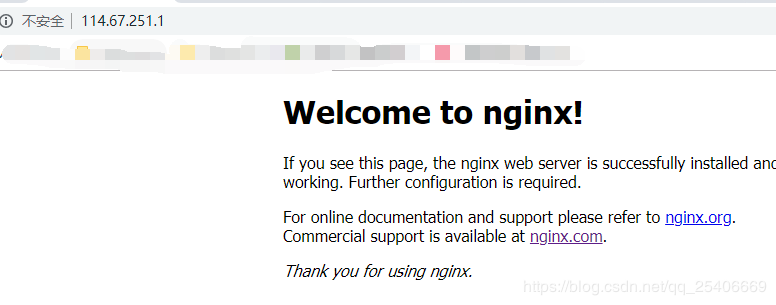
掛載完成以后訪問主頁面:
然后在訪問我們之前在default寫的一個location /images:
重啟nginx:
docker exec -it b511b6049f57 nginx -s reload
到此這篇關于詳解docker nginx 容器啟動掛載到本地的文章就介紹到這了,更多相關docker nginx啟動掛載內容請搜索腳本之家以前的文章或繼續瀏覽下面的相關文章希望大家以后多多支持腳本之家!